Get started
Use the CX Toolbox Dashboard to create an API key, tie it to your Kustomer organization, and invite teammates. This guide walks through that flow end to end.
Sign in
Open CX Toolbox and sign in with your account. After a successful login you are routed to the Dashboard, where you will see who you are signed in as and the main controls for your organization.
Generate an API key
On the Dashboard, select the Dashboard Settings tab (next to User Management). Under Step 1: Generate API Key, you can open billing, rotate the key, or reveal it when you need to copy it.
- Manage Billing — open subscription and payment management for CX Toolbox.
- Rotate API Key — issue a new key (see security below).
- Reveal API Key — temporarily show the key so you can copy it from the API Key field (it is masked by default).
In Kustomer, open your app’s App settings and paste the API key wherever CX Toolbox expects it. All widgets share the same API key for your organization—configure it once in each app or surface that needs access, using that same value.
If an API key is leaked
Use Rotate API Key in the dashboard right away. Rotation invalidates the previous key. Every integration that still uses the old key—including Kustomer app settings and any widgets—will stop working until you replace it with the new key everywhere it is stored.
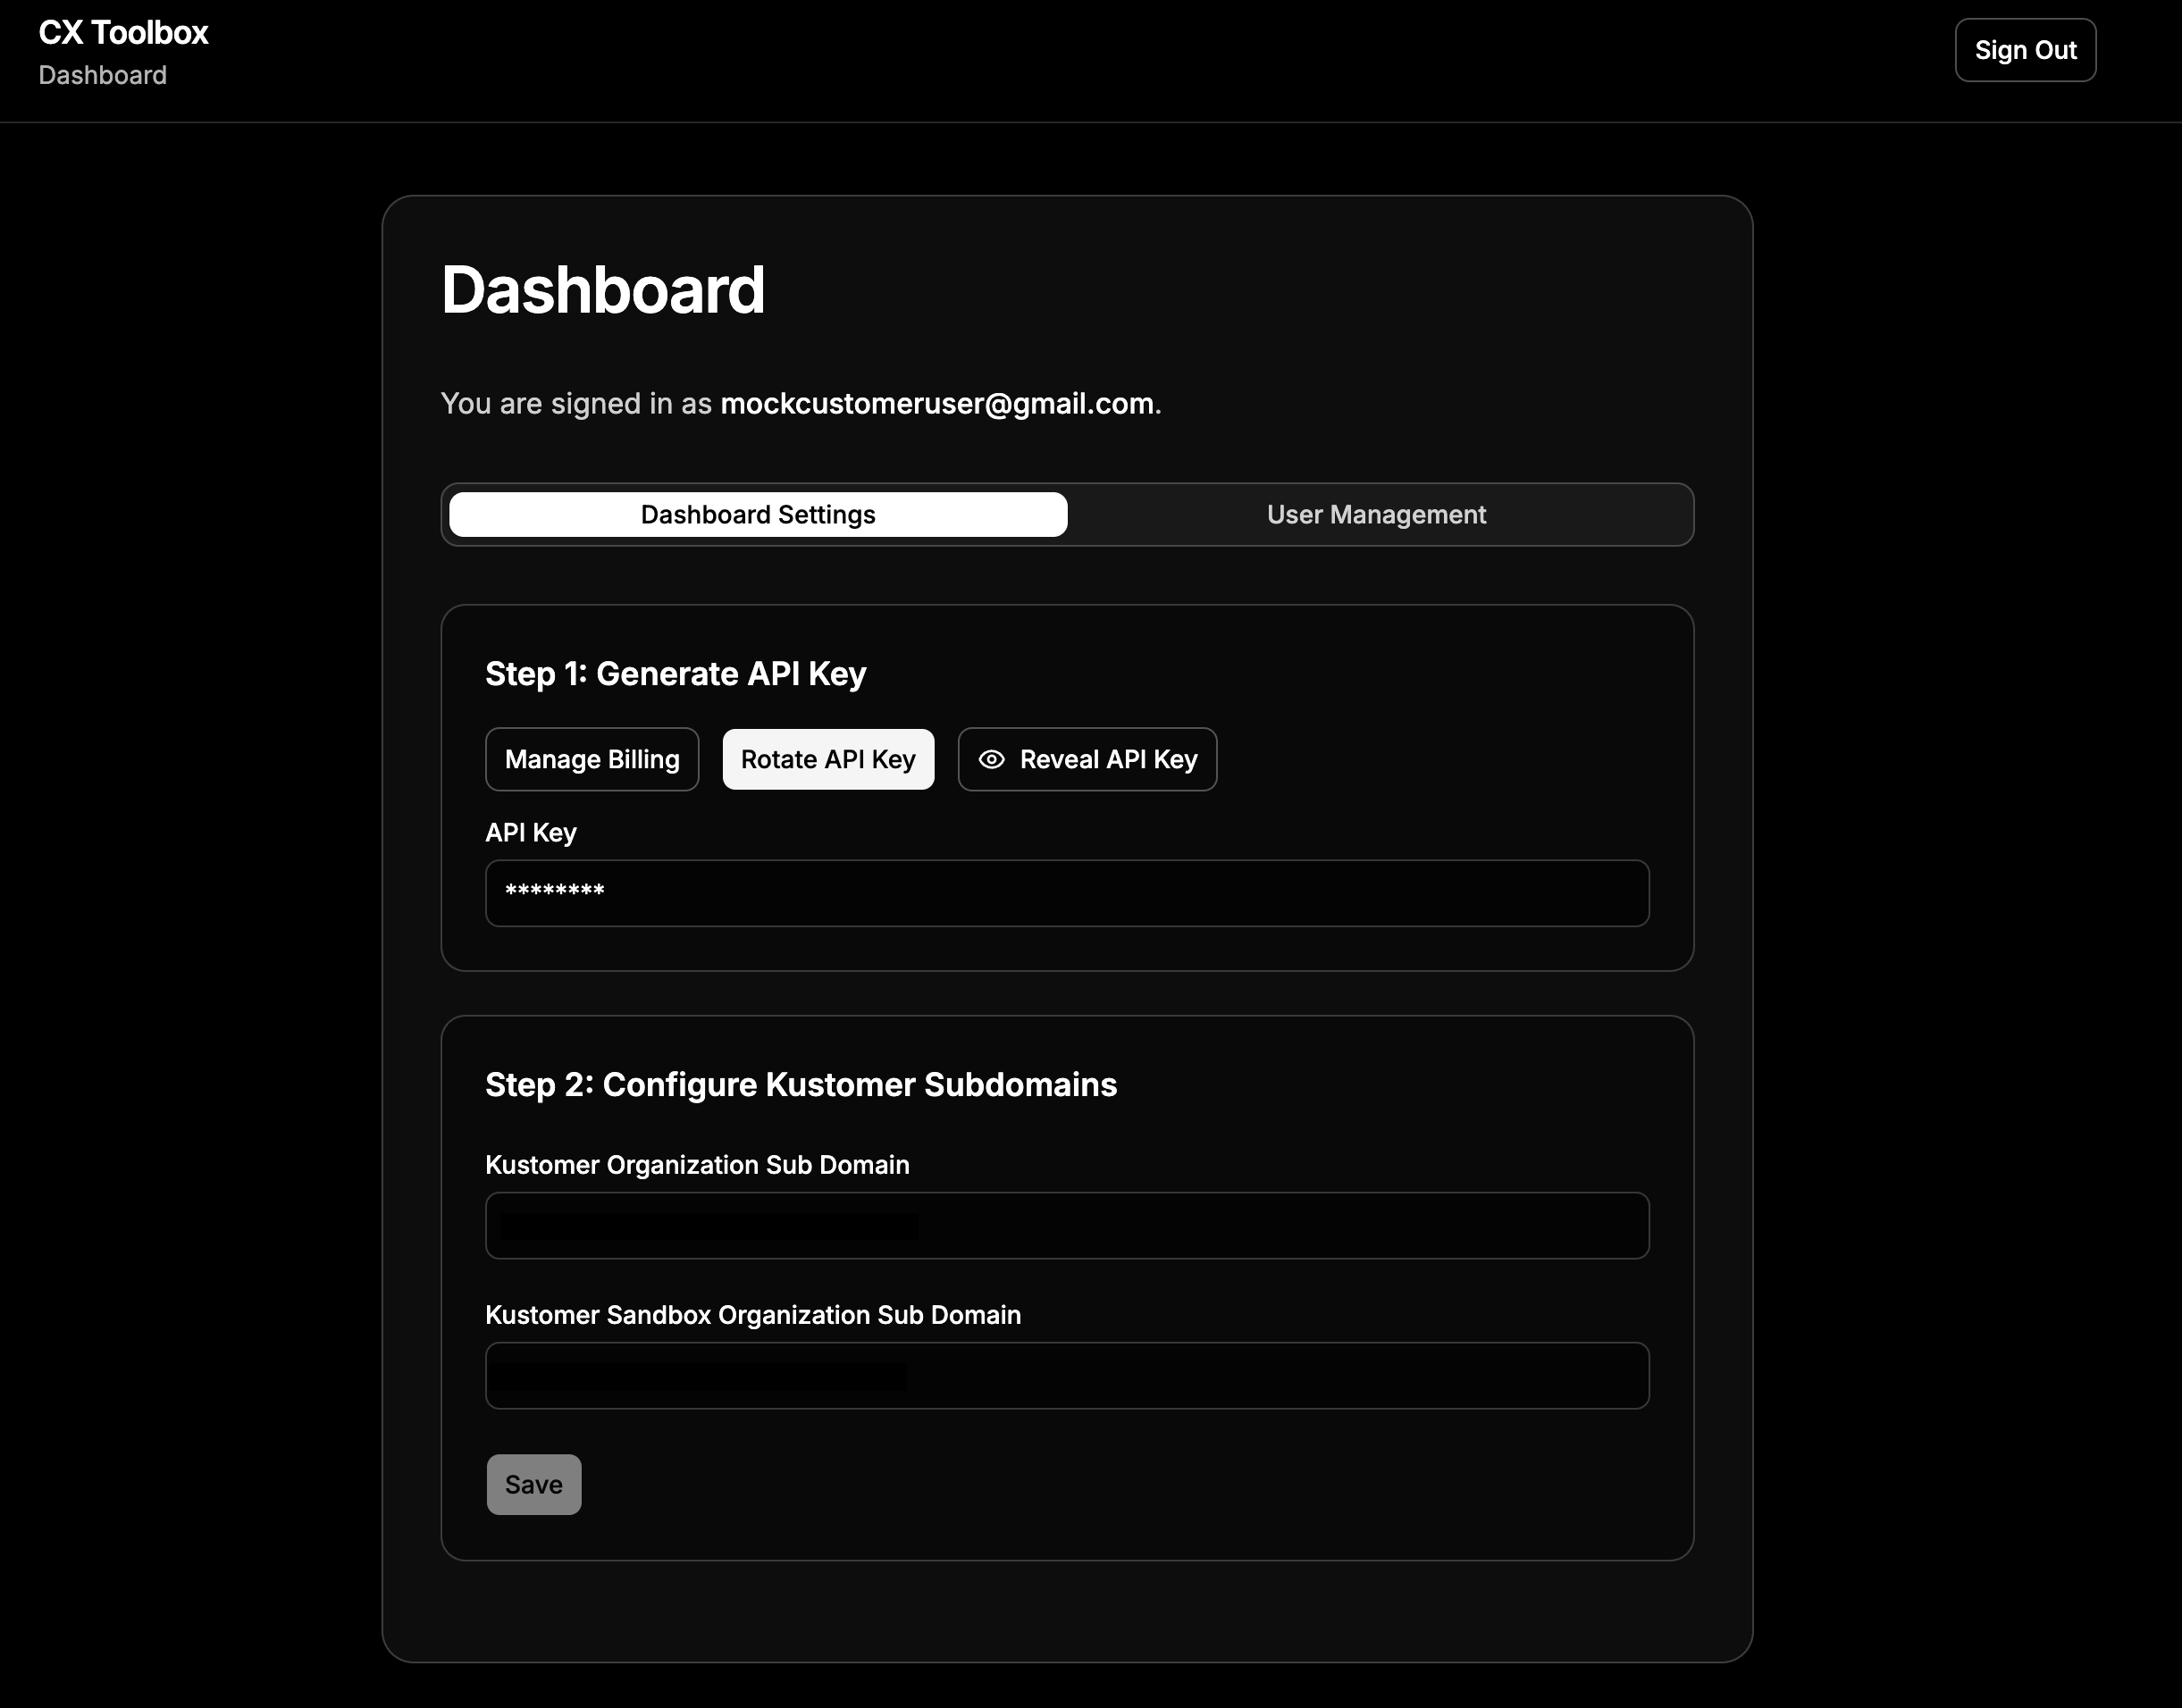
Dashboard Settings: API key controls (Step 1) and Kustomer subdomain fields (Step 2). Configure Kustomer subdomains
Stay on Dashboard Settings. Under Step 2: Configure Kustomer Subdomains, enter your organization’s values:
- Kustomer Organization Sub Domain — the segment that
appears before
.kustomerapp.com. For example, if agents useyourcompany.kustomerapp.com, enteryourcompany. - Kustomer Sandbox Organization Sub Domain — optional.
If you have a sandbox org for testing, enter that org’s subdomain the same way (the part before
.kustomerapp.com).
Click Save when the subdomains are correct so CX Toolbox can route requests to the right Kustomer environment.
- Kustomer Organization Sub Domain — the segment that
appears before
User management and invites
Open the User Management tab on the Dashboard to work with teammates who should access the same CX Toolbox organization.
- Invite User — enter a colleague’s email (for example
teammate@company.com) and choose Send Invite. They receive an email invitation to join. - Invitations — lists pending invites until they are accepted.
- Team Members — shows everyone with access, their role (for example admin), and status (for example active). Your own row is labeled so you can tell which account is yours.
- Hold to Remove — on a member row, press and hold to remove that user from the dashboard (helps prevent accidental removals).
Billing for CX Toolbox is available from Dashboard Settings via Manage Billing, alongside the API key tools.
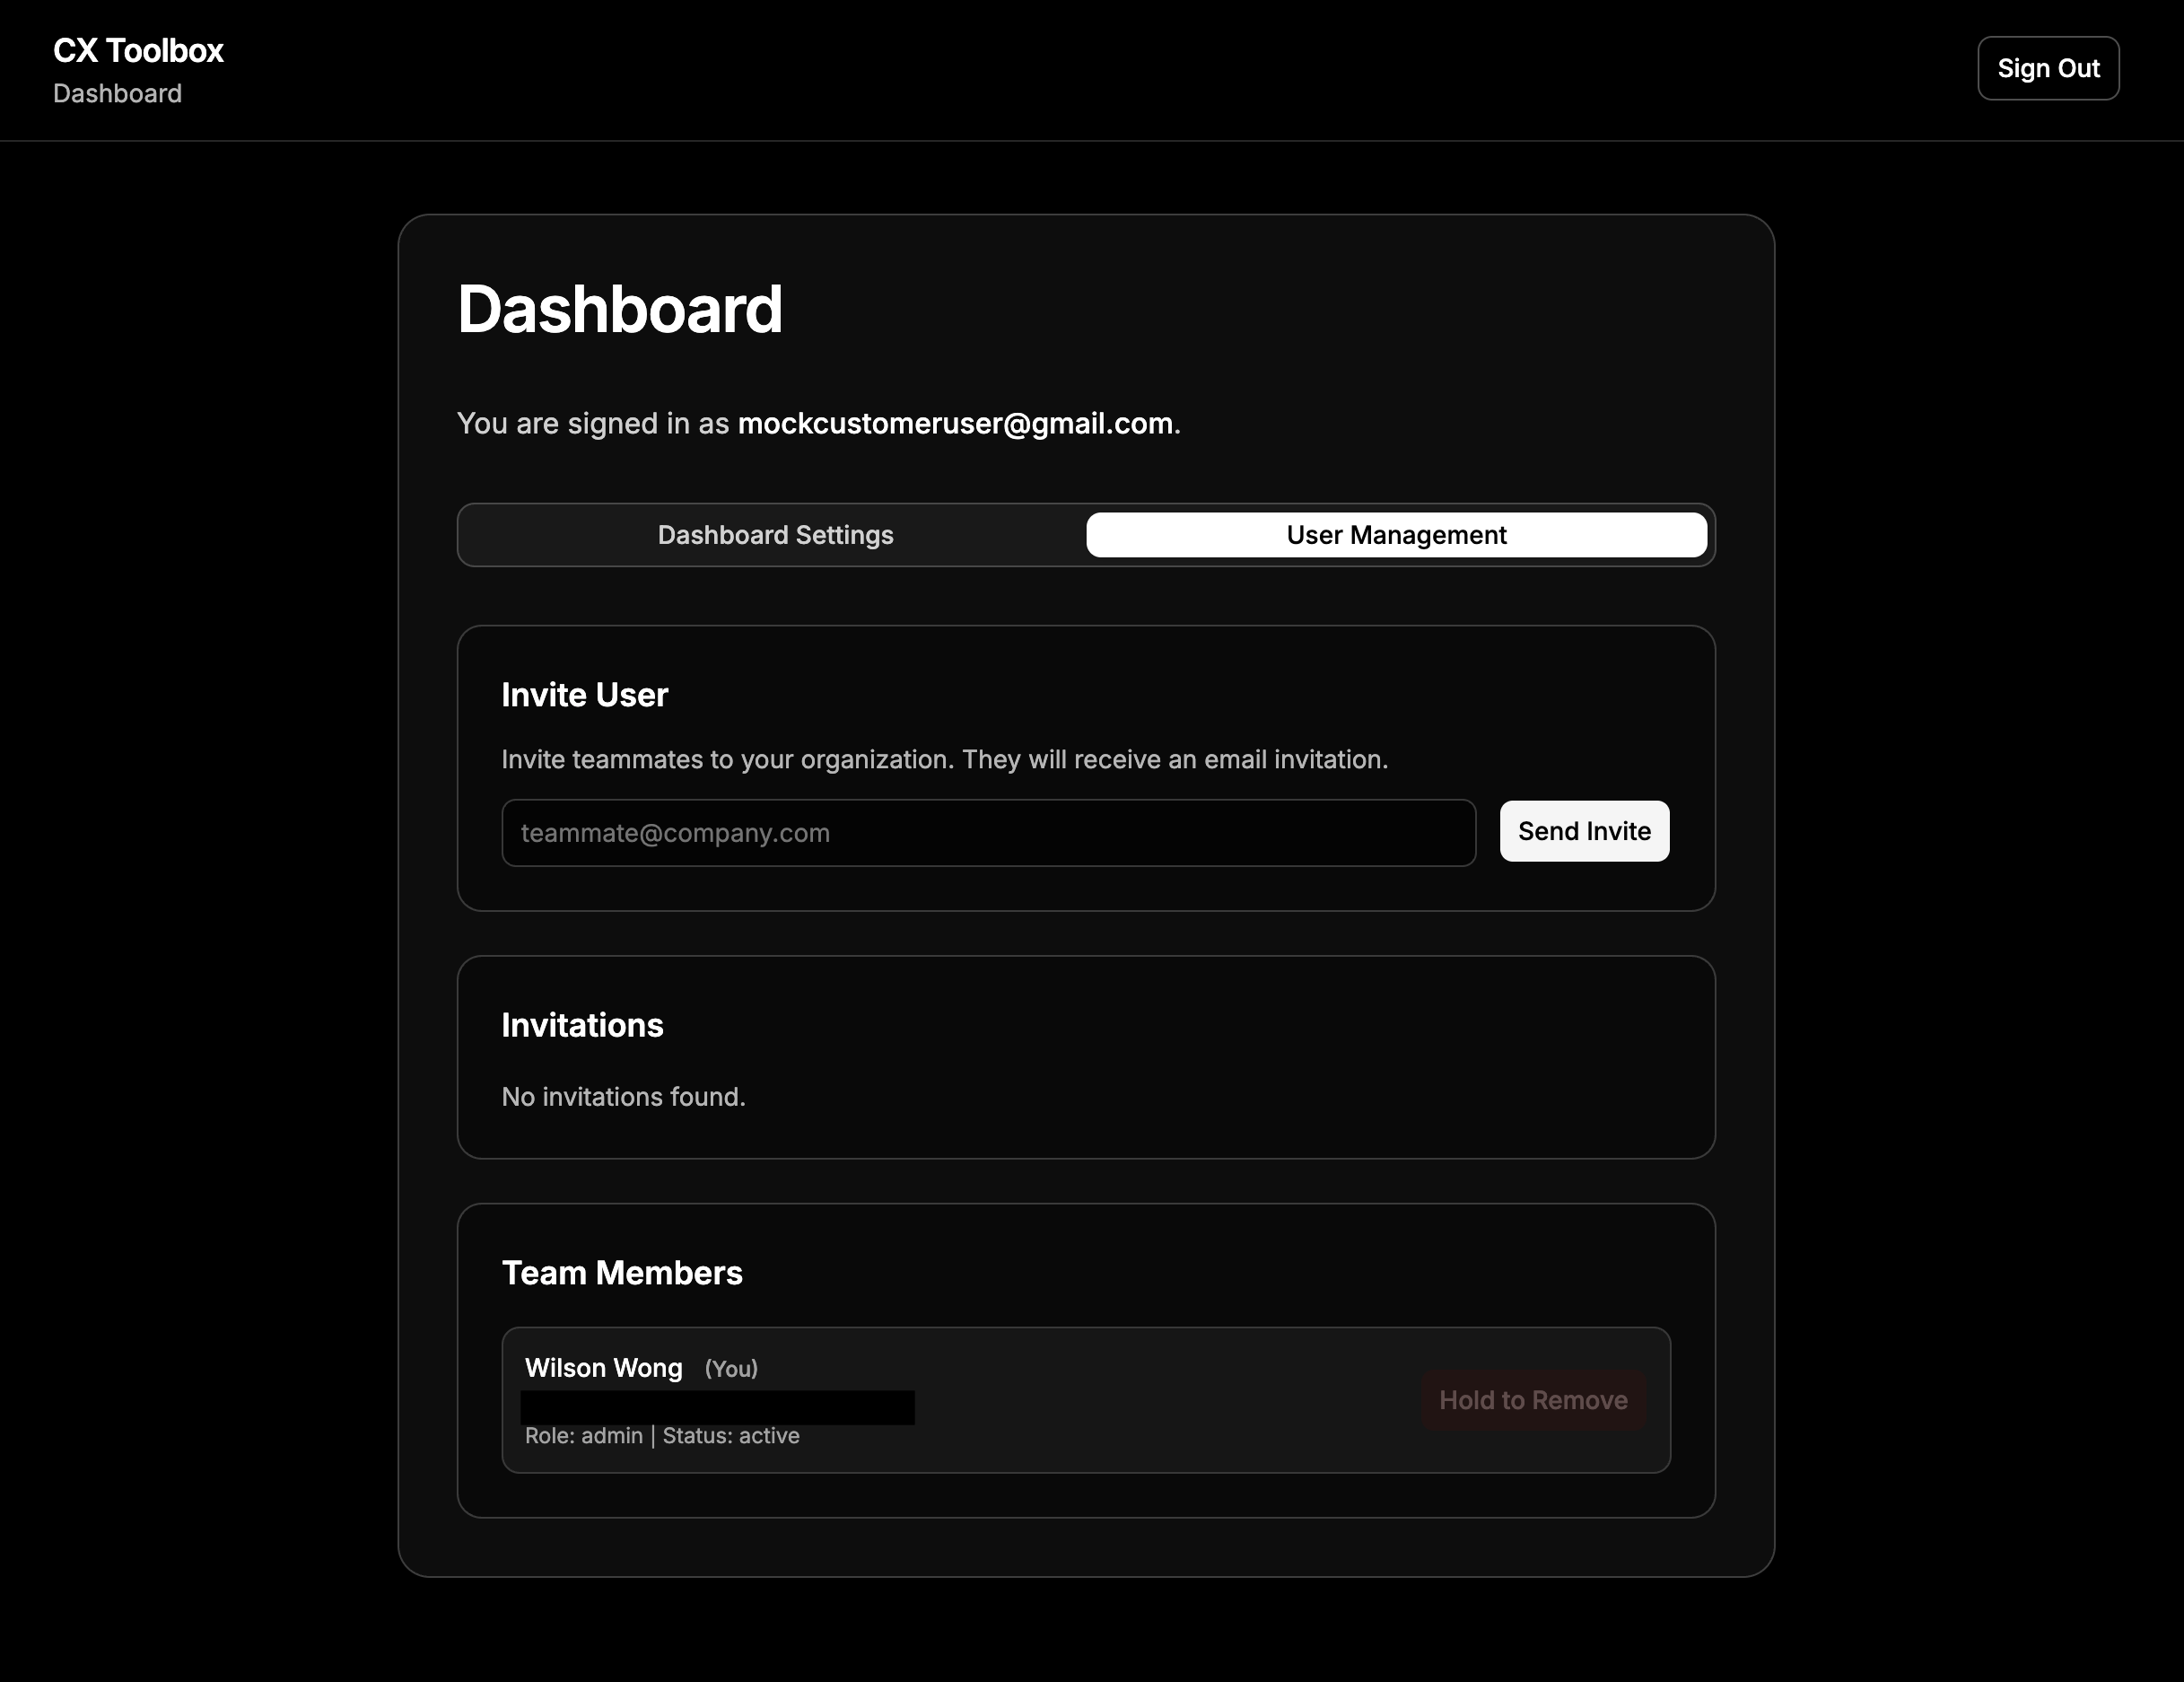
User Management: invite teammates, track invitations, and review team members. - Invite User — enter a colleague’s email (for example
Sidekick: Sidekick · Task Kanban: Task Kanban · Common issues: Troubleshooting